10 Sponge Tips for Smooth Ombré & Dotting Details
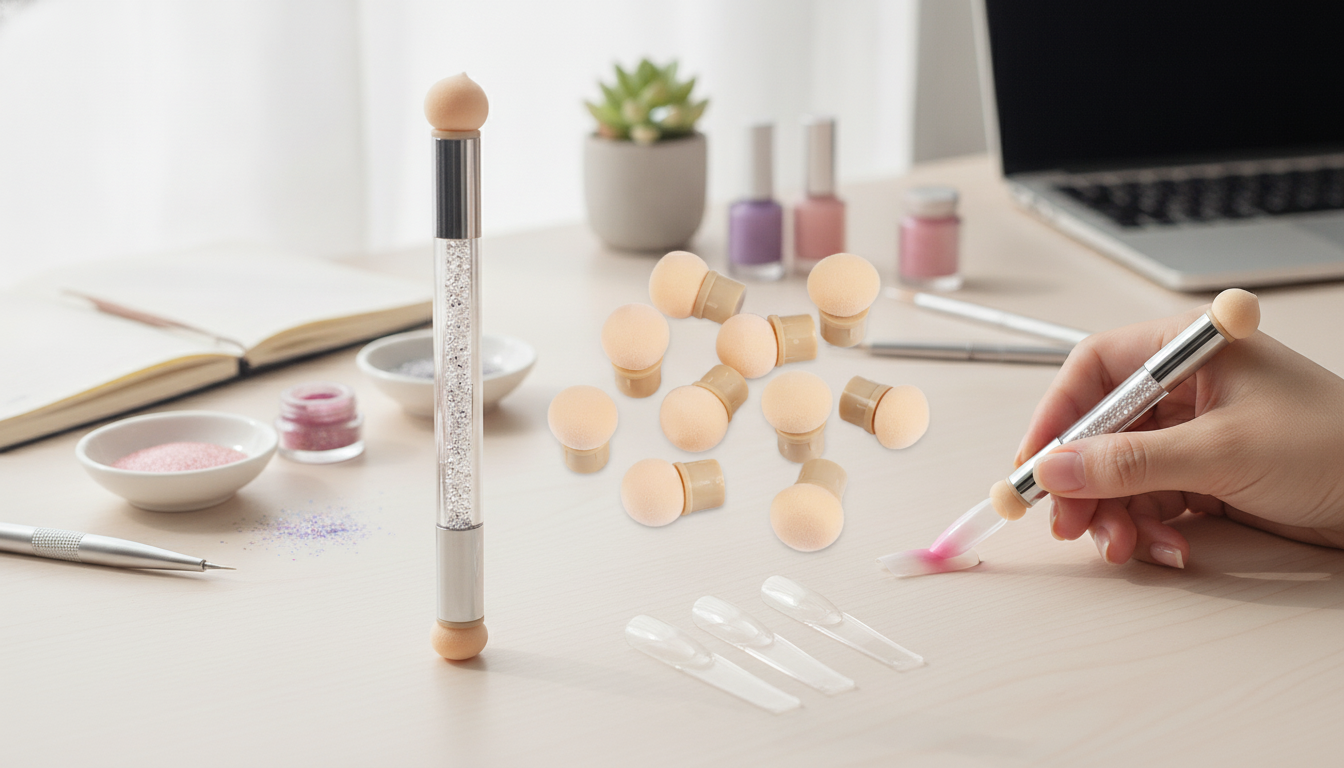
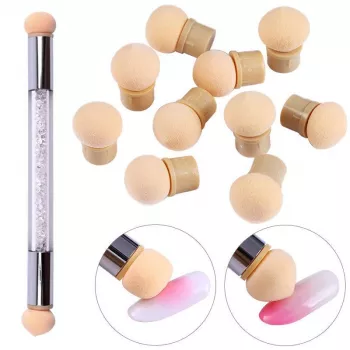
10 Sponge Replacement Heads for Gradient Nails and Dotting Details
Sponge heads are a simple way to get smooth color fades, soft ombré edges, and quick texture effects without investing in a full kit of specialty brushes. A small set of replacement sponge heads can refresh a gradient brush or dotting pen setup, making it easier to stamp, dab, and blend polish with more control and less mess. If you like experimenting with aura nails, glitter fades, or cloud-like backgrounds, having extra sponge tips on hand makes practice sessions faster and cleaner. For more guidance, see [PDF] SAFETY MANUAL – Texas A&M University-Corpus Christi.
What these sponge heads are used for
Replacement sponge heads are designed to pick up a small amount of polish and distribute it in a controlled stipple. That stipple is what helps colors overlap gradually, which is why sponge gradients often look smoother than brush-blended fades. For further reading, see [PDF] AFFIDAVIT – Illinois.gov.
- Creating gradient and ombré nail looks by dabbing polish in thin layers
- Soft blending around the cuticle line when a crisp brush edge feels too harsh
- Building backgrounds for nail art (cloudy effects, aura nails, “airbrushed” fades)
- Adding quick texture effects with glitter, shimmer, or jelly polishes
- Using with a dotting pen body for controlled placement in small areas
What’s included and who it suits
A 10-pack is a practical refill for anyone who already uses a gradient brush or dotting pen handle that accepts sponge tips. Fresh sponge surfaces also reduce the chance of dragging semi-dry polish, which can make gradients look patchy.
- 10 replacement sponge heads for repeated practice and cleaner color changes
- Helpful for beginners learning gradients (fresh sponge surface reduces patchiness)
- Convenient for hobbyists who do frequent color combos and need quick swaps
- Useful for at-home gel users who want soft transitions without heavy brushwork
- A practical refill option for anyone already using a gradient brush or dotting pen handle that accepts sponge tips
Featured items available now
- 10Pcs Sponge Heads for Nail Art Gradient Brush & Dotting Pen
- The Ultimate Productivity Blueprint | Digital Productivity Guide for Goal Setting, Time Management & Daily Routines (handy for planning practice sessions and keeping a simple routine)
Quick technique guide for sponge-head nail art
| Look | How to load polish | Application motion | Best finishing step |
|---|---|---|---|
| Classic ombré (2 colors) | Stripe 2 colors next to each other, slightly overlapping | Light tapping in thin passes; rotate sponge as it saturates | Top coat to melt edges + clean cuticle line |
| Aura / blush nails | Small dot of color in the center; minimal product | Tap outward in a halo; keep the center most saturated | Sheer layer + glossy top coat |
| Glitter fade | Pick up glitter from a palette (not the bottle neck) | Tap from tip downward in short taps | Thicker top coat for smoothness |
| Cloudy background | Very little polish, partly “dry” sponge | Feather-tap in random clusters | Add art layer, then top coat |
How to do a cleaner gradient with sponge heads
The difference between a muddy fade and a clean fade usually comes down to product amount, timing, and pressure. Gradients look best when they’re built slowly in thin layers.
- Prep matters: use a smooth base coat so the sponge taps don’t catch on ridges.
- Use thin coats: multiple light tapping passes look smoother than one heavy pass.
- Let polish get slightly tacky: pause briefly between passes to prevent streaky lift-off.
- Reload often: add small amounts to avoid flooding the sidewalls and cuticle.
- Finish with glossy top coat: it visually blends micro-speckling into a more seamless fade.
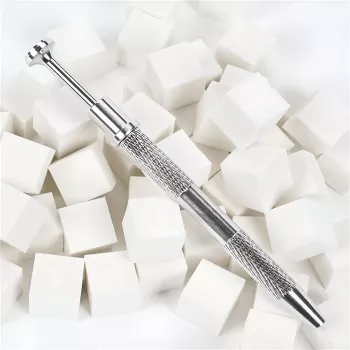
Cleanup is part of the process. A peel-off barrier can save time around the cuticle area, and a small clean-up brush with remover helps sharpen the outline after you’re done tapping.
Dotting, detailing, and small-area blending
Sponge tips aren’t only for big ombré fades. Because you can target the edge or corner of the sponge, they work well for tiny zones where a full sponge wedge would be too bulky.
- Use a smaller tap zone on the sponge head for tight areas like corners and sidewalls
- Create soft French tips by dabbing color at the free edge and blending upward
- Build background haze behind stickers, stamping, or hand-painted art for depth
- For petals or soft hearts: dab two adjacent dots and lightly merge the center
- When combining with a dotting tool: place dots first, then gently tap edges with the sponge to soften
If you’re working near skin, remember that pigments, solvents, and acrylates can be irritating for some people. For general cosmetic guidance, the U.S. Food & Drug Administration (FDA) — Cosmetics resource is a helpful reference point.
Cleaning and reusing sponge heads
Common issues and quick fixes
Pairing with other tools for better results
When you’re ready to restock tips for frequent practice or quick color swaps, 10Pcs Sponge Heads for Nail Art Gradient Brush & Dotting Pen keeps your gradient tool working like new without replacing the whole handle.
FAQ
How many sponge heads are usually needed for one gradient manicure?
Most gradient manicures take 1–2 sponge heads, depending on how many colors you’re blending and how clean you want your transitions. Swap sooner when moving from dark to very light shades or when using glitter to avoid unwanted transfer.
Can sponge heads be used with gel polish?
Yes, but work quickly and don’t cure gel while it’s still in the sponge. Clean the sponge head immediately after use (before curing), and consider dedicating specific heads to gel so the surface stays even.
Why does a gradient look speckled before top coat?
The sponge creates a fine stipple pattern as it deposits tiny dots of polish in layers, which can look grainy while it’s still matte and unsealed. A glossy top coat fills and levels the micro-texture visually, making the fade appear smoother.


Leave a comment